
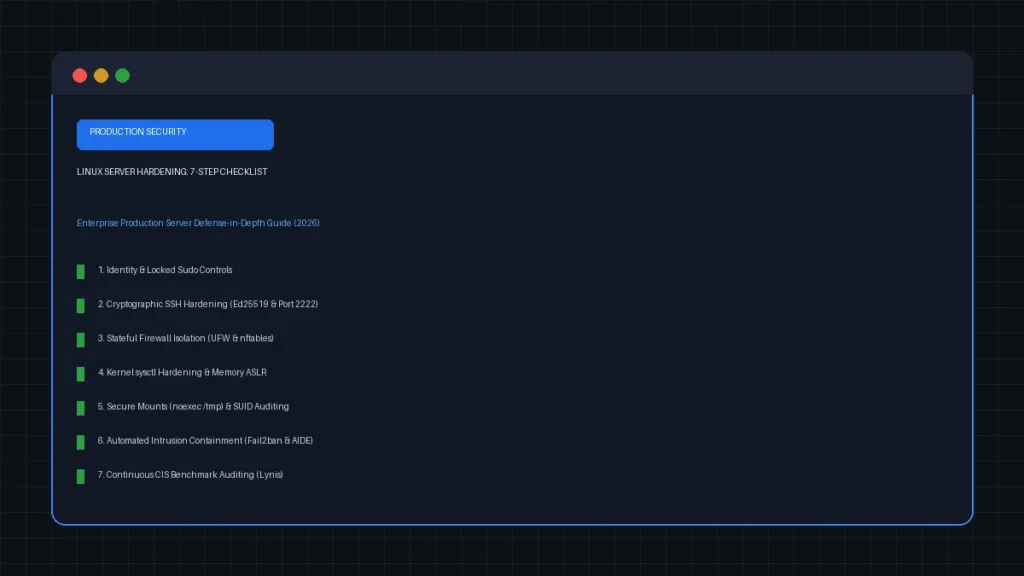
Implementing systematic Linux server hardening is the most critical defensive measure an engineering team can take when deploying instances into modern cloud infrastructure. Within minutes of provisioning a public IPv4 or IPv6 interface, automated botnets begin probing standard ports with credential stuffing, protocol fuzzing, and unpatched vulnerability exploits.
- Table of Contents
- Why Linux Server Hardening Is Essential for Production Environments
- Prerequisites and Operational Scope
- 1. Identity, Users, and Privileged Access Controls
- Disable Direct Root Login
- Configure Sudoers Session Restrictions
- 2. Cryptographic SSH Hardening for Production Server Security
- 3. Network Perimeter Defense and Stateful Firewall Isolation
- UFW (Uncomplicated Firewall) Configuration
- nftables Stateful Filtering for Enterprise Linux
- 4. Kernel-Level Protection and Linux System Hardening via sysctl
- 5. Filesystem Permissions, Mount Security, and SUID Auditing
- Mount Hardening in /etc/fstab
- Auditing SUID and SGID Executables
- 6. Automated Intrusion Prevention and File Integrity Monitoring
- Brute-Force Mitigation with Fail2ban
- File Integrity Monitoring with AIDE
- 7. Continuous Linux Security Best Practices and Lynis Auditing
- Complete Linux Server Security Checklist: 7-Pillar Architecture
- Summary and Next Steps
A default distribution installation is optimized for out-of-the-box convenience rather than defense-in-depth. Leaving standard daemons exposed, default configurations intact, or kernel network protections disabled turns your host into an easy foothold. When an incident occurs, the operational aftermath is severe—ranging from extended downtime to complex post-compromise cleanup and server malware remediation.
This 7-step production guide establishes an enterprise-grade defense framework based on recognized CIS Linux Benchmarks. By enforcing these baseline configurations, you systematically eliminate common attack vectors across Ubuntu LTS, Debian, RHEL, and Rocky Linux environments.
Table of Contents
- Why Linux Server Hardening Is Essential for Production Environments
- Prerequisites and Operational Scope
- 1. Identity, Users, and Privileged Access Controls
- 2. Cryptographic SSH Hardening for Production Server Security
- 3. Network Perimeter Defense and Stateful Firewall Isolation
- 4. Kernel-Level Protection and Linux System Hardening via sysctl
- 5. Filesystem Permissions, Mount Security, and SUID Auditing
- 6. Automated Intrusion Prevention and File Integrity Monitoring
- 7. Continuous Linux Security Best Practices and Lynis Auditing
- Complete Linux Server Security Checklist: 7-Pillar Architecture
- Summary and Next Steps
Why Linux Server Hardening Is Essential for Production Environments
In contemporary DevOps pipelines, automated server provisioning often outpaces security governance. Virtual machines launched in AWS, GCP, Azure, or private clouds frequently inherit default template configurations that expose unnecessary attack surface area.
Attackers do not manually target individual servers during initial reconnaissance. Instead, distributed scanners search for listening ports, unauthenticated endpoints, and outdated OpenSSH implementations.
Applying strict Linux server hardening policies ensures that every layer of the operating system—from kernel runtime parameters and filesystem mount flags to user permissions and cryptographic primitives—actively resists exploitation.
Prerequisites and Operational Scope
Before applying these hardening rules to your live servers, ensure you meet the following baseline requirements:
- Administrative access via root or elevated
sudoprivileges on the target instance. - An established, secondary active SSH session kept open during testing to prevent accidental lockouts.
- A full volume snapshot or system backup taken immediately prior to applying configuration changes.
- Access to standard management tools and packages (
sudo,openssh-server,ufwornftables,curl).
1. Identity, Users, and Privileged Access Controls
Direct root access represents the single largest vulnerability for automated credential abuse. Production hardening begins by locking direct root logins and delegating administrative operations to named users governed by strict sudo policies.
Disable Direct Root Login
Create a dedicated administrative user account, grant it elevated rights, verify authentication via a second shell, and lock the root account:
# Create dedicated administrator account
adduser devopsadmin
usermod -aG sudo devopsadmin  # On RHEL/Rocky Linux: usermod -aG wheel devopsadmin

# Lock the root password to disable direct password authentication
passwd -l root
Configure Sudoers Session Restrictions
Modify /etc/sudoers.d/security via visudo to enforce explicit session timeouts and audit all administrative activity:
Defaults env_reset
Defaults mailto="security-alerts@yourdomain.com"
Defaults mail_always
Defaults timestamp_timeout=10
Defaults logfile="/var/log/sudo.log"
Reducing timestamp_timeout to 10 minutes ensures abandoned terminal windows cannot be hijacked to run unauthorized commands with elevated privileges.
2. Cryptographic SSH Hardening for Production Server Security
Securing the OpenSSH daemon eliminates over 95% of automated external attacks. According to the OpenSSH Project Specifications, legacy ciphers and password authentication represent severe security liabilities.
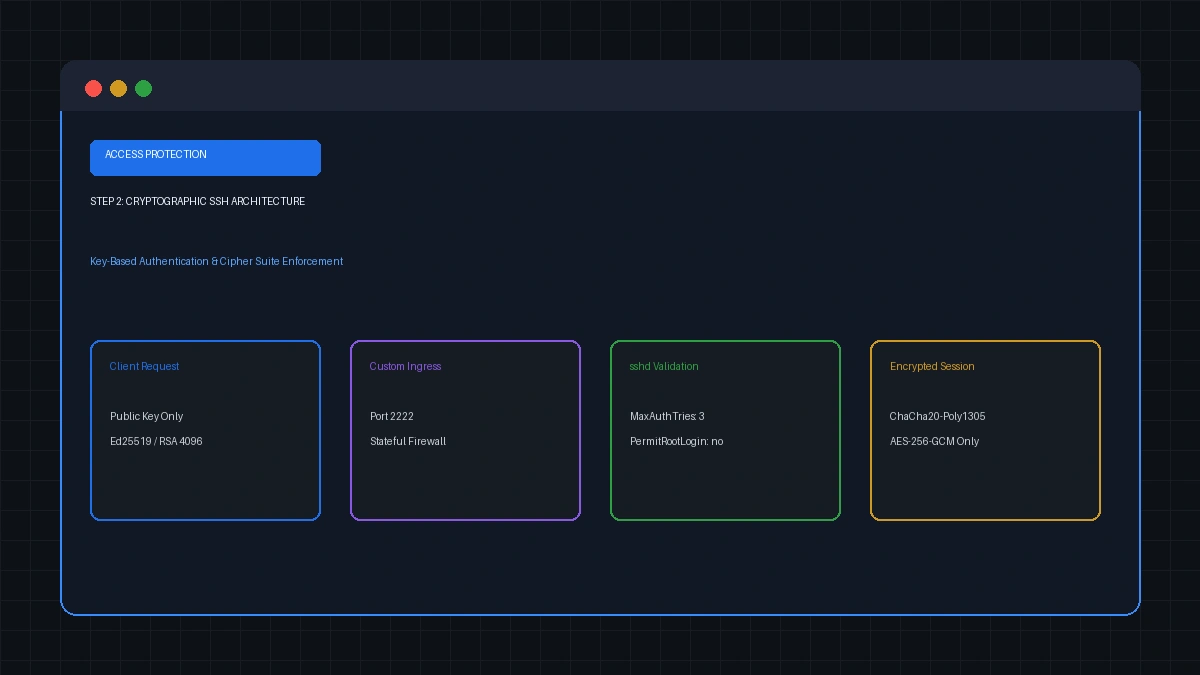
Apply the following production directives in /etc/ssh/sshd_config.d/99-hardened.conf (or /etc/ssh/sshd_config):
# Port and Protocol
Port 2222
Protocol 2
AddressFamily inet

# Authentication Controls
PermitRootLogin no
PasswordAuthentication no
PubkeyAuthentication yes
AuthenticationMethods publickey
MaxAuthTries 3
MaxSessions 2

# Cryptographic Ciphers & Key Exchange
KexAlgorithms curve25519-sha256,curve25519-sha256@libssh.org,diffie-hellman-group16-sha512,diffie-hellman-group18-sha512
Ciphers chacha20-poly1305@openssh.com,aes256-gcm@openssh.com
MACs hmac-sha2-512-etm@openssh.com

# Session Management & Forwarding Restrictions
ClientAliveInterval 300
ClientAliveCountMax 2
X11Forwarding no
AllowAgentForwarding no
AllowTcpForwarding no
Validate syntax and restart the OpenSSH service:
sshd -t && systemctl restart sshd
Enforcing modern cryptographic primitives such as chacha20-poly1305 and curve25519 guarantees strong forward secrecy while preventing protocol downgrade vulnerabilities.
3. Network Perimeter Defense and Stateful Firewall Isolation
A production server should never listen on unrestricted network interfaces. Enforce strict ingress and egress boundaries using stateful packet filtering.
UFW (Uncomplicated Firewall) Configuration
On Debian and Ubuntu hosts, set default drop rules and explicitly whitelist required ports:
# Default policies: block all inbound, permit outbound
ufw default deny incoming
ufw default allow outgoing

# Allow customized SSH port and application endpoints
ufw allow 2222/tcp comment 'Hardened SSH'
ufw allow 80/tcp comment 'HTTP Web Traffic'
ufw allow 443/tcp comment 'HTTPS Web Traffic'

# Enable firewall and inspect status
ufw enable
ufw status verbose
nftables Stateful Filtering for Enterprise Linux
For modern enterprise distributions utilizing nftables, configure a stateful drop policy for all untracked connections:
table inet filter {
    chain input {
        type filter hook input priority 0; policy drop;
        ct state established,related accept
        iif "lo" accept
        tcp dport 2222 accept
        tcp dport { 80, 443 } accept
    }
}
Verify that only expected network sockets are in a listening state across all network interfaces:
ss -tulpn
4. Kernel-Level Protection and Linux System Hardening via sysctl
The Linux kernel networking stack and memory management subsystems contain numerous runtime parameters that must be optimized to repel network-level denial of service and memory corruption exploits. Official guidance from The Linux Kernel Documentation recommends tuning these settings in production.
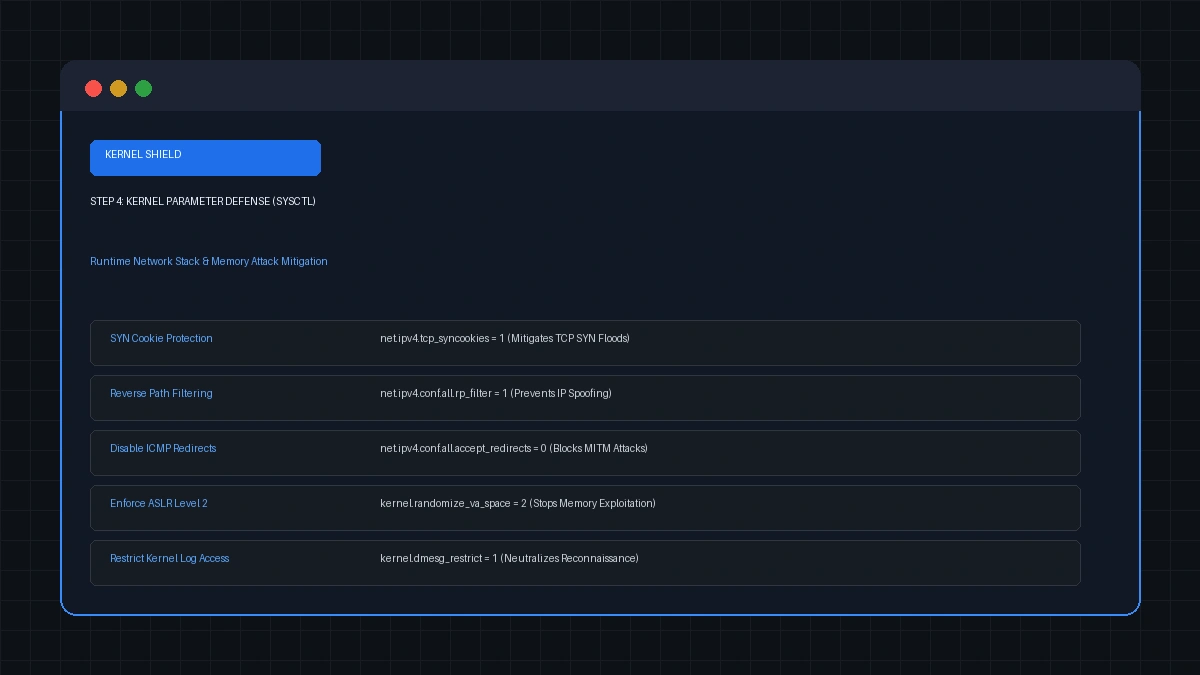
Create /etc/sysctl.d/99-security-hardening.conf and populate it with the following verified values:
# IP Spoofing & Source Routing Defense
net.ipv4.conf.all.rp_filter = 1
net.ipv4.conf.default.rp_filter = 1
net.ipv4.conf.all.accept_source_route = 0
net.ipv6.conf.all.accept_source_route = 0

# ICMP Redirect Mitigation (Stops Man-In-The-Middle attacks)
net.ipv4.conf.all.accept_redirects = 0
net.ipv4.conf.default.accept_redirects = 0
net.ipv6.conf.all.accept_redirects = 0
net.ipv4.conf.all.send_redirects = 0

# TCP SYN Flood Protection
net.ipv4.tcp_syncookies = 1
net.ipv4.tcp_max_syn_backlog = 4096
net.ipv4.tcp_synack_retries = 2

# Memory Address Space Layout Randomization (ASLR Level 2)
kernel.randomize_va_space = 2

# Filesystem Link & FIFO Protections
fs.protected_hardlinks = 1
fs.protected_symlinks = 1
fs.protected_fifos = 2
fs.protected_regular = 2

# Restrict Kernel Buffer Logging to Root
kernel.dmesg_restrict = 1
kernel.kptr_restrict = 2
Reload and apply the configuration immediately across the live system:
sysctl --system
Enabling kernel.randomize_va_space = 2 enforces full Address Space Layout Randomization (ASLR), significantly increasing the computational complexity of buffer overflow and Return-Oriented Programming (ROP) exploitation attempts.
5. Filesystem Permissions, Mount Security, and SUID Auditing
Temporary storage locations like /tmp, /var/tmp, and /dev/shm are the primary destinations attackers use to stage and execute malicious payloads. Restricting partition execution privileges completely neutralizes dropped scripts.
Mount Hardening in /etc/fstab
Add explicit isolation flags to temporary partitions in /etc/fstab:
# Secure Mount Options for Temporary Storage
tmpfs     /tmp       tmpfs   defaults,noexec,nosuid,nodev,size=2G   0 0
tmpfs     /dev/shm   tmpfs   defaults,noexec,nosuid,nodev           0 0
Apply the updated mount options without rebooting the system:
mount -o remount /tmp
mount -o remount /dev/shm
The noexec parameter prevents binary execution from /tmp, while nosuid strips setuid privileges, preventing privilege escalation from world-writable locations.
Auditing SUID and SGID Executables
Setuid binaries run with root privileges regardless of which user initiates them. Conduct regular sweeps to identify and strip SUID bits from non-essential binaries:
# Locate all SUID binaries across the root filesystem
find / -perm /6000 -type f 2>/dev/null
Strip SUID permissions from utilities rarely required by unprivileged users:
chmod u-s /usr/bin/chfn /usr/bin/chsh
6. Automated Intrusion Prevention and File Integrity Monitoring
True production server security requires proactive detection and rapid containment mechanisms that operate autonomously around the clock.
Brute-Force Mitigation with Fail2ban
Install Fail2ban to automatically identify and drop IP addresses exhibiting repetitive failed authentication attempts:
apt install fail2ban -y
Configure /etc/fail2ban/jail.local with aggressive ban thresholds for the OpenSSH service:
[sshd]
enabled = true
port = 2222
maxretry = 3
findtime = 600
bantime = 86400
backend = systemd
File Integrity Monitoring with AIDE
Advanced Intrusion Detection Environment (AIDE) computes cryptographic hashes of critical binaries, libraries, and configuration files to alert administrators to unauthorized file alterations:
apt install aide -y
aideinit
cp /var/lib/aide/aide.db.new /var/lib/aide/aide.db
Schedule automated integrity verification via root cron:
0 4 * * * /usr/bin/aide --check | mail -s "AIDE Daily Security Audit" sec-ops@yourdomain.com
7. Continuous Linux Security Best Practices and Lynis Auditing
Server security is an ongoing operational lifecycle rather than a static deployment task. To ensure compliance with CIS benchmarks and enterprise standards, conduct periodic automated security scans with Lynis:
apt install lynis -y
lynis audit system
Lynis benchmarks your system configuration against hundreds of security checks, generating an objective Hardening Index score alongside remediation guidance. As demonstrated in our enterprise security audit case study, routine automated audits frequently catch configuration drift and exposed attack surfaces before adversaries discover them.
Complete Linux Server Security Checklist: 7-Pillar Architecture
The matrix below illustrates the 7-pillar defense architecture required for complete production server protection:
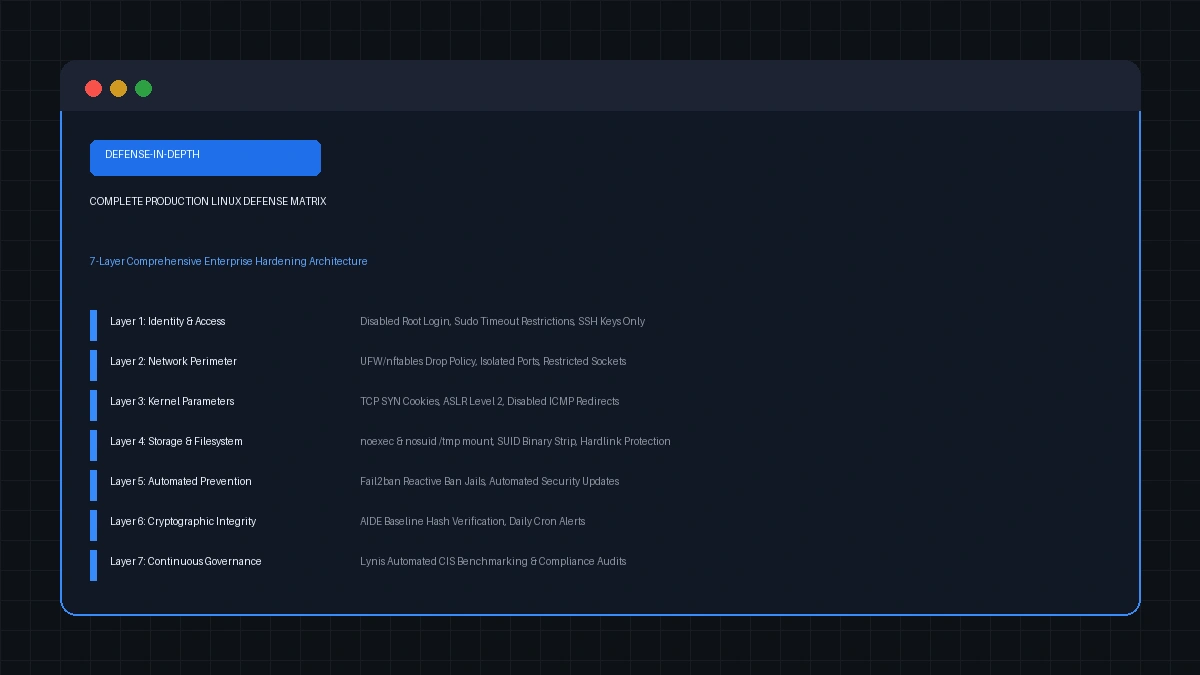
| Security Domain | Control Mechanism | Defense Objective | Implementation Priority |
|---|---|---|---|
| 1. Identity & Access | Locked root, sudo timeouts, SSH keys | Prevent brute force & session hijacking | Critical |
| 2. Network Perimeter | UFW / nftables default deny incoming | Eliminate unauthorized ingress ports | Critical |
| 3. Kernel Hardening | sysctl SYN cookies & ASLR level 2 | Neutralize network floods & memory exploits | High |
| 4. Storage & Mounts | noexec,nosuid on /tmp and /dev/shm | Block execution of dropped malware | High |
| 5. Intrusion Defense | Fail2ban reactive jail enforcement | Automated real-time IP containment | High |
| 6. File Integrity | AIDE cryptographic baseline checks | Immediate detection of rootkits/trojans | Medium |
| 7. Governance | Lynis automated CIS benchmark scans | Continuous compliance & drift detection | Medium |
Summary and Next Steps
Implementing disciplined Linux server hardening is essential to safeguarding critical business data and web applications. By enforcing key-based cryptographic authentication, strict firewall ingress whitelisting, kernel memory protections, and automated auditing, your infrastructure achieves resilience against both automated crawlers and targeted intrusion attempts.
Incorporate these hardening configurations directly into your deployment pipelines—whether utilizing Ansible roles, Terraform provisioning scripts, or cloud-init automation templates—ensuring that every new production instance is secure by default from the first boot.